The VPN app says Connected. A leak test tells you whether the browser you’re actually using still exposes your usual public IP address, IPv6 address, DNS resolver or an address through WebRTC. The simplest way to tell is to compare that browser before and after you connect, then verify anything suspicious with a second test.
Affiliate disclosure. We may earn a commission if you buy through a link in this guide.
These checks work with the VPN you already have. If you want a desktop app with a kill switch and DNS controls, you can try NordVPN.
Start with a baseline in the same browser
On a network you trust, note your usual public IP address and DNS provider with the VPN disconnected. A public IP test site can see the address you use to reach it, so keep this baseline private. Reconnect your VPN, wait for the connection to settle, and open a fresh tab in the same browser. Repeat each check with the VPN on.
Keep the browser and its settings the same on both runs. If your VPN is a browser extension, test in the browser where it’s enabled. Private browsing is optional. Some extensions need separate permission to run in a private window. The distinction also applies to browser-only tools such as Microsoft Edge Secure Network and the Proton VPN extension for Firefox (both guides in French).
1. Check your public IPv4 and IPv6 addresses
Look at the main IP Address field and the separate IPv6 Leak Test section. The main address should change to a VPN exit address when you connect. For IPv6, you’ll typically see either an address routed by the VPN or no public IPv6 address at all. The clearest warning sign is the same public address from your baseline appearing in either field. Open the BrowserLeaks IP test.
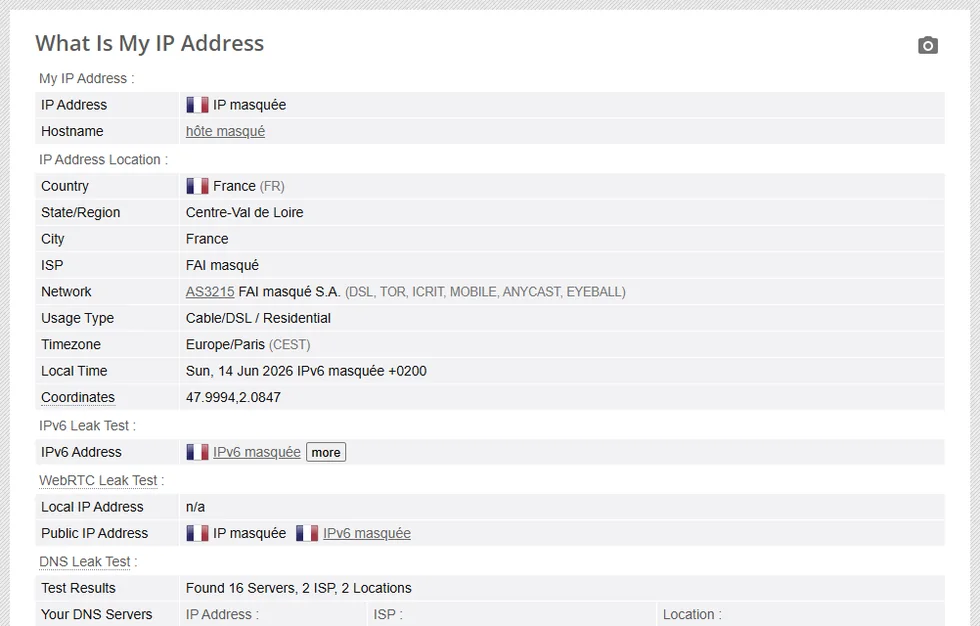
Start with the actual address. The country and city shown beside it come from geolocation databases and can be inaccurate. A different city alone tells you less than seeing your home IP address again.
2. Check the WebRTC public IP field
WebRTC helps browsers make calls and connect to peers. Its network checks may surface addresses in addition to the one used to load the page. Compare the Public IP Address under Your WebRTC IP with your baseline. Your usual public IP appearing while the VPN is on is the result to investigate. Open the BrowserLeaks WebRTC test.
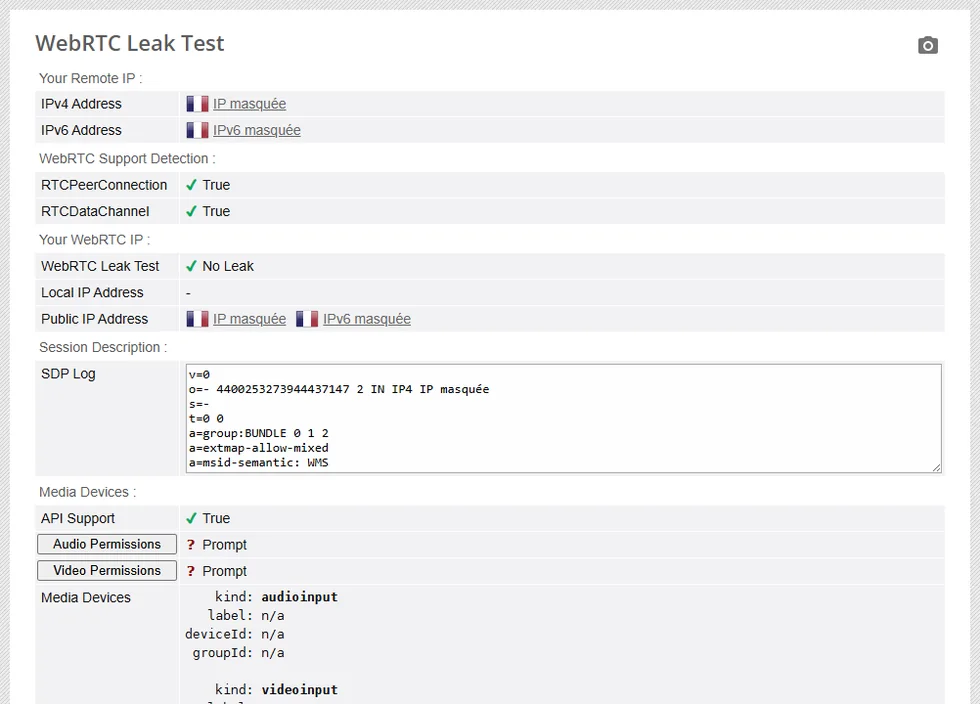
A private address such as 192.168.x.x or a name ending in .local can describe your local network. Treat it separately from a public IP address that a site can associate with your ISP. If only WebRTC shows your baseline public IP, check whether your VPN or browser has a WebRTC privacy setting. Check your next video call after changing it.
3. Run a DNS leak test
The tool asks your browser to resolve a set of domains and lists the DNS servers that answered. Compare those providers with your baseline and with the DNS setup you expect from your VPN. Seeing your home ISP’s resolver again is a signal to check how DNS is configured, especially if you never set a custom resolver. Open the BrowserLeaks DNS test.
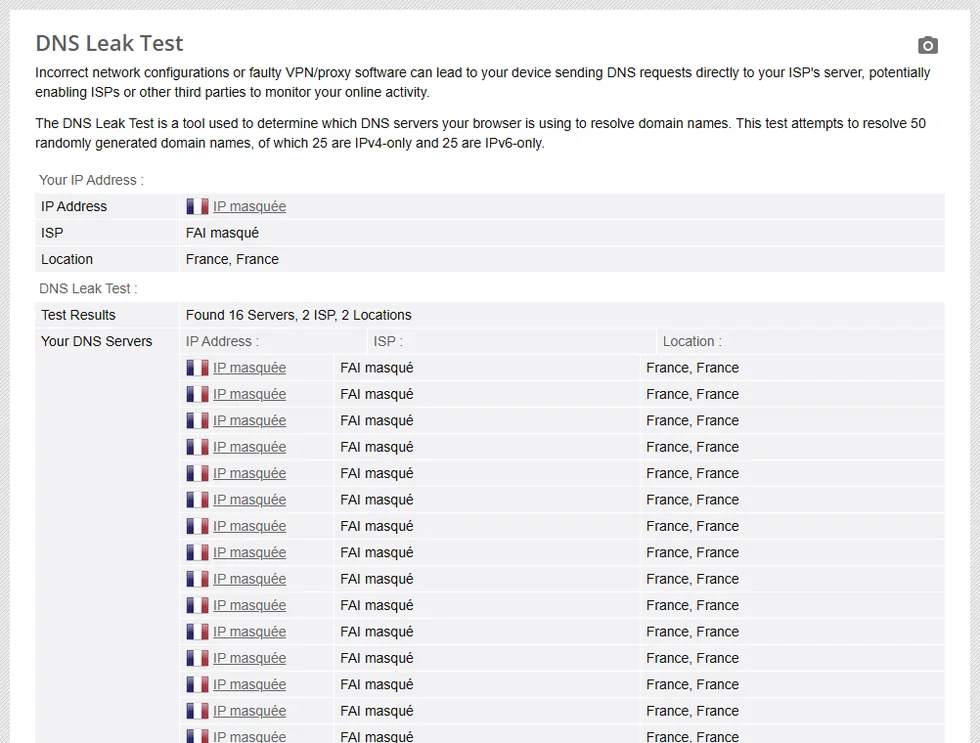
A third-party DNS provider can appear because your browser uses Secure DNS or because your VPN or device is configured to use that resolver. Its location can also differ from the VPN exit. Check those settings before assuming any unfamiliar resolver means traffic escaped the tunnel.
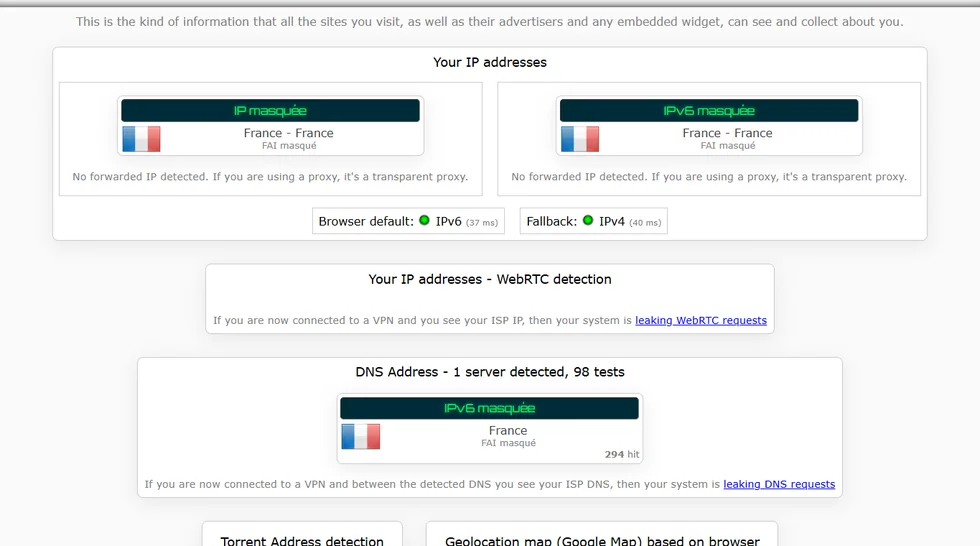
4. Cross-check with IPLeak
With the VPN still connected, open a second tool in the same browser. Wait for its DNS checks to finish, then compare the public IP, IPv6, WebRTC and DNS blocks with the first three results. You can leave the optional location prompt and unrelated tests alone. Open IPLeak.
| Check | What you want to see | What to investigate |
|---|---|---|
| Public IP | A public exit address consistent with your VPN | Your baseline public IPv4 address |
| IPv6 | A VPN IPv6 address or no public IPv6 | Your baseline public IPv6 address |
| WebRTC | No exposure of your baseline public address | Your baseline public address in the WebRTC results |
| DNS | The VPN or another intentionally configured resolver | Your ISP’s resolver appearing unexpectedly |
What to do if one of the checks fails
- Public IP or IPv6. Confirm the VPN is connected and that the browser isn’t excluded through split tunneling. Reconnect to another server and retest. For IPv6, check whether your provider tunnels it or blocks it.
- DNS. Review the VPN’s DNS protection and any custom or Secure DNS settings in the browser or operating system. Reconnect, open a fresh tab and run the test again.
- WebRTC. Check whether the VPN app or extension provides a protection setting. If you change browser settings, retest both the leak check and a video call you use.
- The results change on every run. Keep the same device, browser, network and VPN server while you troubleshoot. Change one setting at a time and repeat the checks in the same order.
A desktop VPN makes sense if you switch between browsers or need protection for other apps on the device. If a connection drop is the issue, look for the VPN’s kill switch and verify how it works separately. These browser tests check what was visible during the test session.
Frequently asked questions
How can I tell whether my VPN is leaking DNS?
Run a DNS leak test with the VPN connected and compare it with your baseline and your expected DNS settings. Follow up if your ISP’s resolver is still appearing unexpectedly.
Do I have to disable WebRTC?
Start by checking whether it exposes the public IP address from your baseline. If it does, try the WebRTC controls supplied by your VPN or browser. Disabling WebRTC can affect calls.
Can a free VPN or browser extension leak?
Any VPN setup can behave differently from what you expect. An extension generally covers its own browser, so test that browser and verify which traffic the provider says it protects.
When should I repeat the test?
Run it after setup, a VPN or browser update, or a change to DNS, split tunneling or the way you connect. A fresh test is also worthwhile when something unexpectedly shows your usual location or network.