Our Path Tek video tutorial shows the complete Voice Changer workflow in English, from uploading a recording to checking the downloaded MP3.
To change a recorded voice in ElevenLabs, open Voice Changer, upload your audio, choose a new voice, and generate a preview. The tool starts with your performance, so a well-timed pause or a quiet line can carry through to the new voice. Below, you can hear the same nine-second clip before and after conversion and see the settings used in the video.
Astuce2Geek may earn a commission if you make a purchase through links in this article, at no extra cost to you.
Start with one sentence you’ve recorded yourself.
Try Voice Changer in ElevenLabs and keep this guide open so you can compare the settings and the finished audio.
The quick version
- Pick a short, clear recording of one speaker.
- Open Voice Changer and upload the file or record a clip.
- Choose a voice and a model that supports the language you spoke.
- Check the settings and the credit cost, then generate the audio.
- Compare both versions at the same volume, download the result, and play the downloaded file.
What Voice Changer does
Say you’ve recorded an introduction with the right pacing and want to hear it in a deeper voice. Give Voice Changer that take and choose a target voice. Your own delivery provides the starting point. For a written script, use Text to Speech instead. Our English Text to Speech tutorial on Path Tek shows how to generate a voice-over from a script and download it.
The words stay in their original language. You can use a library voice without cloning anyone’s voice or writing code. The result is a processed audio file you can bring into an editor. For a live microphone effect in Discord or a game, you’d need a separate tool.
Prepare a short recording you can compare
Record ten to twenty seconds with one complete sentence, a short pause, and a second sentence spoken a little more softly. That gives you more to listen for than a single word and is easier to compare than a whole interview.
Play the file before uploading it. Make sure one person is speaking clearly and there’s no loud music underneath. If the recording crackles on louder words, move a little farther from the microphone or lower the input gain and record it again. Raising the volume later can’t recover detail lost to clipping.
If a fan or hiss gets in the way, try cleaning a copy first. See our ElevenLabs Voice Isolator walkthrough and listen to the cleaned recording before using it as your source.
Keep the original as intro-original.wav and name the converted file something like intro-adam.mp3. Use a different name for each voice so you can compare the right files and keep the source intact.
The official Voice Changer guide lists a limit of five minutes and under 50 MB per file. It lists audio formats including MP3, WAV, M4A, FLAC, OGA, and OGG, and video containers including MP4, MOV, WebM, and MKV. If your recording is too long, split it at natural pauses.
1. Open Voice Changer in ElevenLabs
Open ElevenLabs, sign in, and find Voice Changer in the left sidebar. Depending on your workspace layout, it may be under More tools. The video reaches this step at about 0:30.
Look for an upload area with voice settings alongside it. A large field for typing a script means you’re in Text to Speech. Some help pages still call Voice Changer Speech to Speech.
2. Upload an audio file or record a clip
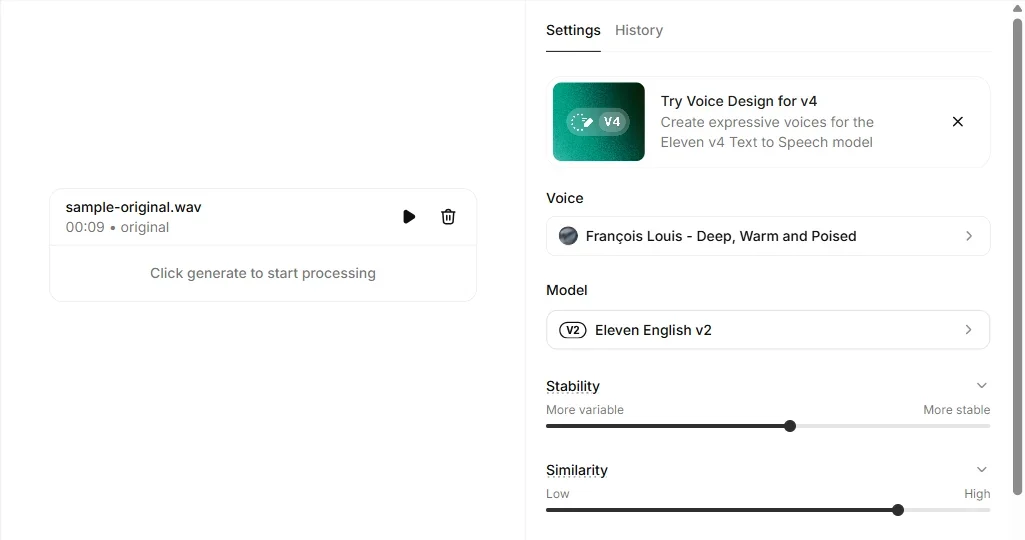
Click the upload area or drag your recording into it. Wait for the filename and duration to appear. In the demonstration, the source file is called sample-original.wav. Check the duration against the file you meant to use, especially if you have several exports with similar names.
Record directly in your browser
Click Record audio, allow microphone access when prompted, and record a short sentence. Listen back before converting it. If it’s silent, check the selected microphone in the browser and make sure the headset or system input isn’t muted. A webcam, headset, and built-in microphone may all be listed.
3. Choose a voice and model
Preview a few voices and pick one that suits the recording. For a calm explanation, listen for clear words and a voice you’ll want to hear for more than a few seconds. For a character, try a voice with a more distinctive tone. Try your first choice on the same sentence before going back to the library.
The video uses Adam, labeled American, Dark and Tough at the time of recording, and Eleven English v2. Voice names and labels may change as the library evolves.
Match the model to the language you spoke.
For French or another supported language, choose the multilingual Voice Changer model. The official model list uses the identifier eleven_multilingual_sts_v2. The video uses the English-only model. The multilingual model also supports English recordings.
The settings used in the video
Use these values as a baseline for the same clip. The controls you see can vary with the model or the version of the interface.
| Setting | Value in the demo | What to listen for |
|---|---|---|
| Stability | 50% | An even voice with enough variation to sound natural. |
| Similarity | 75% | How closely the result resembles the selected voice. |
| Style Exaggeration | 0 | Delivery without added emphasis from the style control. |
| Speaker boost | On | Resemblance to the target voice when both files play at the same volume. |
| Remove Background Noise | Off | The source in the video was already clear. |
| Output format | MP3, 44.1 kHz, 128 kbps | A file that’s easy to play and import. |
Raise Stability a little if the delivery varies too much between sentences. Lower it slightly if the result sounds flat. Use Similarity to adjust how closely the conversion matches the target voice, and start with Style Exaggeration at zero.
Speaker boost can strengthen the resemblance and may add processing time. If background noise is a problem, test the noise removal toggle separately. Change one setting at a time while keeping the voice and source clip fixed. Note the values so you can return to a take that worked.
4. Generate and compare both takes
Check your remaining balance and the estimated credits for the clip, then click Generate speech. Listen to the original and the converted version at the same playback volume. A louder clip can sound more impressive before you’ve had a chance to notice lost words or an awkward pause.
Hear the original and converted audio
Both files come from the video demo. The English source runs about nine seconds. The second clip is the same performance converted to Adam’s voice with the settings above. Listen for the pauses and the last syllable.
Before — original recording
Download the original recording (WAV)
After — converted with Adam
Download the converted recording (MP3)
For your own recording, play a full sentence without looking at the screen. Check that you can make out every word and still hear the pauses that matter. Revisit the specific syllables that sound off before rerunning the whole clip.
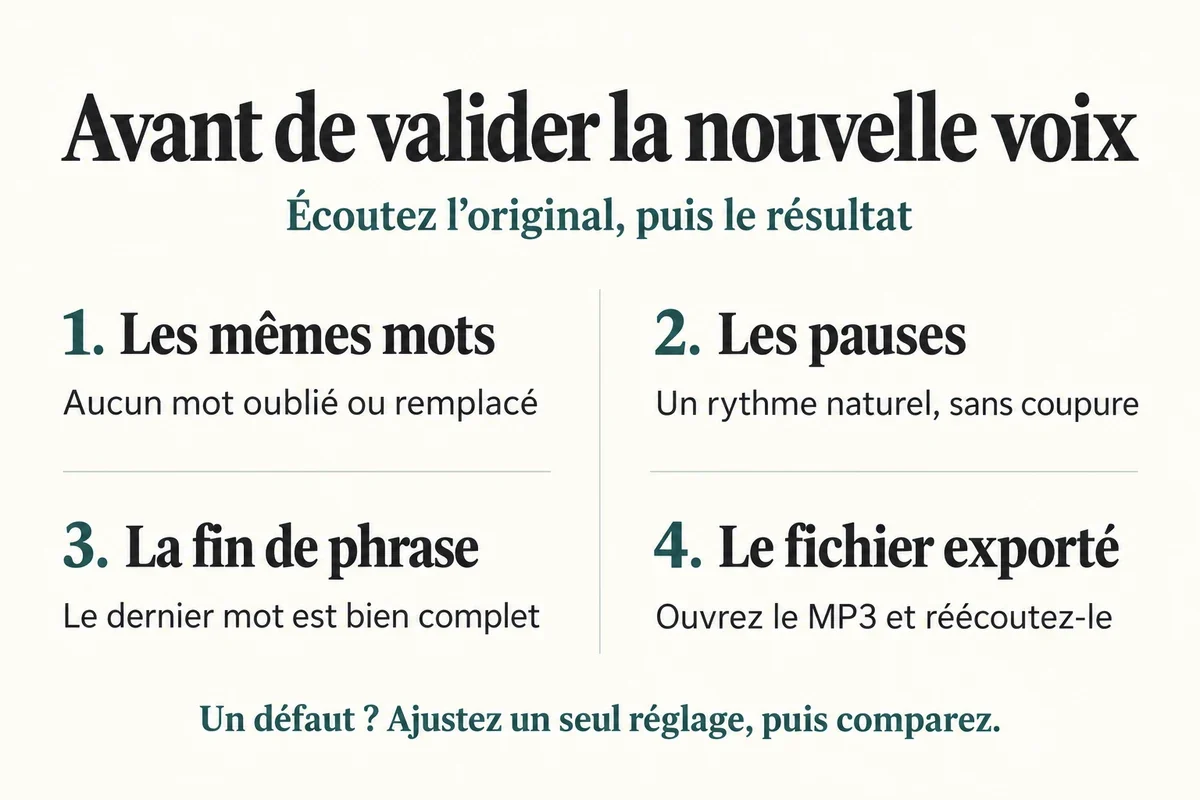
5. Download the MP3 and play the file
Click the download button next to the result, give the file a clear name, and find it in your selected folder or your browser’s downloads. This is the step shown at about 2:52 in the video. Play the downloaded MP3 from the first word to the last, even if the online preview sounded right.
If you’ve left the result page, open History. The Voice Changer guide describes MP3 and WAV downloads with additional format options under Advanced. Use the formats available to your account. Changing a filename from .mp3 to .wav leaves the underlying format unchanged.
Replace the voice in a video
Import the new track into your video editor and line it up with the start of the original. Mute the old voice track to avoid hearing both voices at once. If music and speech were mixed into one source track, check whether you have a separate copy of the music to use.
Play the beginning, middle, and end against the picture. For a speaker on camera, check that the timing still lines up with their mouth movements. Keep the original track in the project until you’re happy with the exported video.
Fix the most common problems
| Problem | Check first |
|---|---|
| The upload is rejected | Check the format, duration, and file size. Try a short MP3 or WAV file. |
| The microphone recording is silent | Check browser permissions and which input device is selected. |
| Some words are mispronounced | Check the language model and listen for those words in the original. |
| The converted voice sounds metallic | Listen for clipping, room echo, or masking noise in the source. Test the settings on a short section. |
| The delivery sounds flat | Try a different target voice or adjust Stability a little. |
| The end of the sentence is cut off | Compare both files through the last word and leave a little silence after your next take. |
| You can’t find the result | Check History and your browser’s download folder. |
Check credits and usage rights before a bigger project
Voice Changer uses credits. Review the estimate for your clip and the current ElevenLabs plan limits before making several versions. The estimate depends on the length of the recording. Pricing can differ between the web app and the API. Downloading an existing result from History doesn’t create a new conversion.
For a monetized video, ad, or client job, check your plan’s commercial license and the permissions for your chosen voice. ElevenLabs’ publishing policy explains that free-plan output has no commercial license and lists the attribution required when sharing it for non-commercial use. Use an authorized recording and label synthetic speech accurately.
One sentence is enough for your first test.
Try Voice Changer with your own audio and play both files through the last word before using more credits on a longer take.
Frequently asked questions
Can I use ElevenLabs Voice Changer for free?
You can try it within the credits and voices available to your account. Check the estimate before generating and the plan’s attribution and usage requirements before publishing any output.
Which model should I use for a French recording?
Choose the multilingual Voice Changer model that supports French, identified as eleven_multilingual_sts_v2 in the docs. The demo uses Eleven English v2 for an English recording.
Does Voice Changer translate what I say?
No. It changes the voice while keeping the words in the source language. Use a dubbing or translation tool if you need the recording in another language.
Can I use Voice Changer live on Discord?
This workflow produces a file after processing a recording. Record audio captures a clip in the browser. To change the sound of a live Discord microphone, you would need a different tool.
Do I need to clone a voice first?
No. Select a voice already available in your account or the library. For a personal voice clone, follow the platform’s separate permission and verification requirements.
Can I change the voice in a video file?
Voice Changer accepts some video formats as input. The output here is an audio track. Import it into your editor, align it with the picture, and mute the original dialogue before exporting.